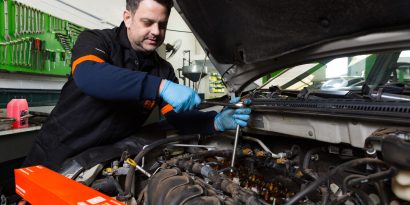
Those who work with engine repair and grinding generally know by heart the maintenance routine of the main parts and components of this assembly. But it is also true that handling the head can be a challenge apart, since its assembly requires a lot of precision and technique. That is why, in this article, we will better understand how to assemble the head valve and the main precautions with the application. Come with RIO!
Understanding the functions of the valve
Also known as engine valves, the head valves are made of a carbon steel alloy and have a circular shape at their base, with a perpendicular stem in the center. Its base works in direct contact with the valve control, a part also known as cam or eccentric and, when rotating, allows the air and fuel mixtures to enter the engine block.
In summary, before knowing how to assemble the head valve, the professional must understand that these parts are largely responsible for the conduction and control of air and fuel inlet and outlet of the cylinders mounted on the head. Here, it is important to remember that when the valve is pushed by the drive, it slides inside another component, known as the valve guide.
The guide, in turn, serves to ensure that the movement happens without friction or friction and always with the same alignment. Then, another component, called a head spring, is in charge of pushing the valve back to the original position, sealing the entry and exit of any substance from the combustion chambers.
In other words, when it comes to the operation of the head, practically all the components that are part of this structure serve to, in one way or another, support the movement of the head valve and ensure the power supply of the engine during its operation — hence the importance of having that extra care during the application process!
Understand how to assemble the head valve safely
Thinking about simplifying the applicator routine, we have separated some good practices and installation tips that can contribute to the day-to-day grinding. In addition to, of course, giving more security and reliability to the work of the professional! So write it down there:
1- Be careful with the valve lock
One of the main tips on how to assemble the head valve concerns, precisely, the set of splines at the end of this piece. It is a kind of channel, whose function is to attach the valve to the head structure. But do not forget that the valve needs to rotate around the axle itself during its operation to ensure uniform wear at the points of contact with the seat. Therefore, do not overtighten this latch during the application!
2- Give preference to prepared valves
When installing a new valve in the head valve, keep in mind that there is already specific technology to take care of the treatment of the contact point of the seat with the valve. But everything is much simpler if you don’t even have to touch the piece, right? This is why RIO valves already leave the factory with the ideal treatment for seating on the valve. In addition, our catalog offers varied treatment and inclination options, ideal for customized projects.
3- Do not forget to prepare the valve seat
The RIO valves also receive a cemented carbide insert in the areas of contact with the seat. The idea is to increase the strength of the material and ensure a longer service life for the component. However, it is important that the valve seat is prepared and properly ground to receive the new component, ensuring accurate sealing and avoiding subsequent rework.
4- It is important to pay attention to the inclination of the valve
Beware of perpendicularity at the time of installation. The inclination of the valve stem must always be exactly 90 degrees for it to have the correct alignment with the valve guide and seat. Remember that all of these components work in synergy and, therefore, it is essential that the installation is done accurately.
5- Recovering old valves is dangerous
When the grinder receives an engine that is already at a certain age, it is common for the driver to experience problems such as loss of power, high fuel consumption and even excess smoke in the exhaust. This is usually caused by loss of valve pressure, which may be worn or misaligned. Here, the ideal is always to replace the component with a new part, since any failure in this system has a severe effect on the parts.
6- Manual adjustment of the seat is possible, but it is not always indicated
With the use of grinding paste and with the right tools, the grinder can make the seating between seat and valve manually. But beware: this process requires technique and enough precision not to damage the components. In addition, it is important to wash the header thoroughly afterwards to eliminate the residual material from the assembly, since it is extremely abrasive and can damage the entire structure in the long term.
Count on RIO for a stock always full of the good and the best
In closing, a tip on the house: in addition to good service, maintaining a high standard of quality with the parts and equipment you use is also an excellent way to keep your clientele satisfied. So count on RIO, which offers a complete catalog of head valves for different lines and with different oversizes! All the translation and orange quality you already know with the best of automotive technology you only find here!


